Hongke Medical dental chair
Unpacking and installed dental chair demonstration
1. Open the wooden case
Tools: screws, Claw hammer
Notice:
(1).Please check whether the wooden case is intact before unpacking. Please give us feedback in time If the wooden case is damaged
(2). Please read the instructions carefully and install with the video reference
Unpacking sequence is as follows:
A. Wooden roof A
B. Front and rear board B(145*130cm)
C. Left and right boards C(110*130cm)

Using a hammer and screwdriver, disassemble the wooden box, remove the accessory box. Unwrap the plastic bag and cut off the protective film, Remove other accessories from the box

2. Preparation before moving chair
Tools: scissors, fixed wrench, level ruler
(1)After connecting the power supply of the dental chair, open the Air-water- electric 3 in 1 switch of the dental chair
(2)Rising the chair cushion and remove the bottom shell and front shell
(3) Using a wrench, remove the 4 screws from the bottom of the chair frame

(4)Lower the chair cushion
(5)Turn off the power and pull out the power cord of the dental chair
(6)Remove the block from under the chair case
(7)Hold the position of the backrest curved plate of the dental chair frame and the tripod on the bottom plate with your hands, and place the dental chair on a flat, level, and solid ground can connected water and electricity.
(8)Then put the lever ruler on the chair frame bottom plate and leveling up and down
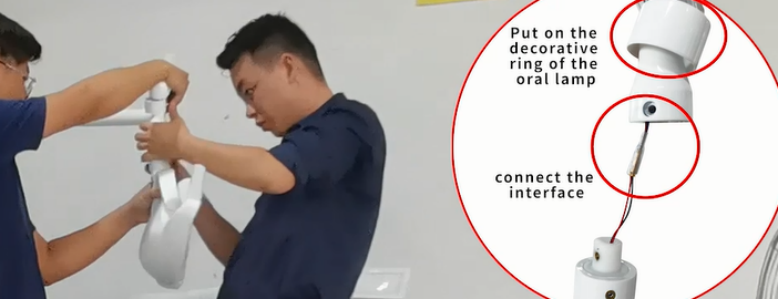
3. lamp arms, LED lamp installation
Tools: Scissors
(1)Take out the lamp arm and assemble it
(2) Connect the line inside the lamp arm with the line above the side box, and install it in the corresponding position.
(3) Connecting interface, cover the center column decoration ring
(4)Take out the lamp with handle and install it on the lamp arm joint
(5) Put on the decorative ring of the oral lamp and connect the interface
5. Water, air, electric pipe connection and function debugging
Notice:
① For newly decorated clinics and hospitals, it is necessary to ensure that the outlet port of water and air is connected through without impurities before the equipment is connected, so as to prevent a large number of impurities from entering the machine in newly decorated pipelines
② Input voltage should be kept within 10% of the city voltage to avoid damage to the machine.
③ Connecting the power and raise the dental chair to the highest position
④ After checking and cleaning the water, air and electricity lines in the clinic, remove the two locking nuts from the parts bag
⑤ Put them on the joints connecting the water pipe and the air pipe respectively, and lock them tightly.
⑥ Put the sewage pipe into the sewage hole to discharge sewage
⑦ After the installation, turn on Air-water- electric 3 in 1 switch to test each function

6. Installation of dentist’s chair
(1). Remove the spare parts from the packaging and remove the packaging of the dentist’s chair feet and wheels,
(2). And respectively install the wheels on the wheel holes of the chair feet
(3). Install the thick side of the air spring into the large hole in the foot of the chair.
(4). After removing the cushion package, install the round hole under the cushion facing the position above the air spring.
(5). Remove the packaging of the backrest of the seat and insert the support column of the back of the seat into the rectangular hole under the cushion.
(6). Adjust the tightness to semi-tight
(7).Then sit in the chair and further adjust to the right position.